Speed Up WooCommerce Checkout – My Proven 5-Step Method: Did you know that a simple one-second delay in your checkout page loading time can slash your sales by 7%? That’s not just a number; it’s real money walking out of your digital door. After over a decade of building and fixing WooCommerce stores, I’ve seen firsthand how a slow, clunky checkout can be the silent killer of a promising online business. It’s the final step, the moment of truth, and if it feels like a chore, your customers will simply give up.
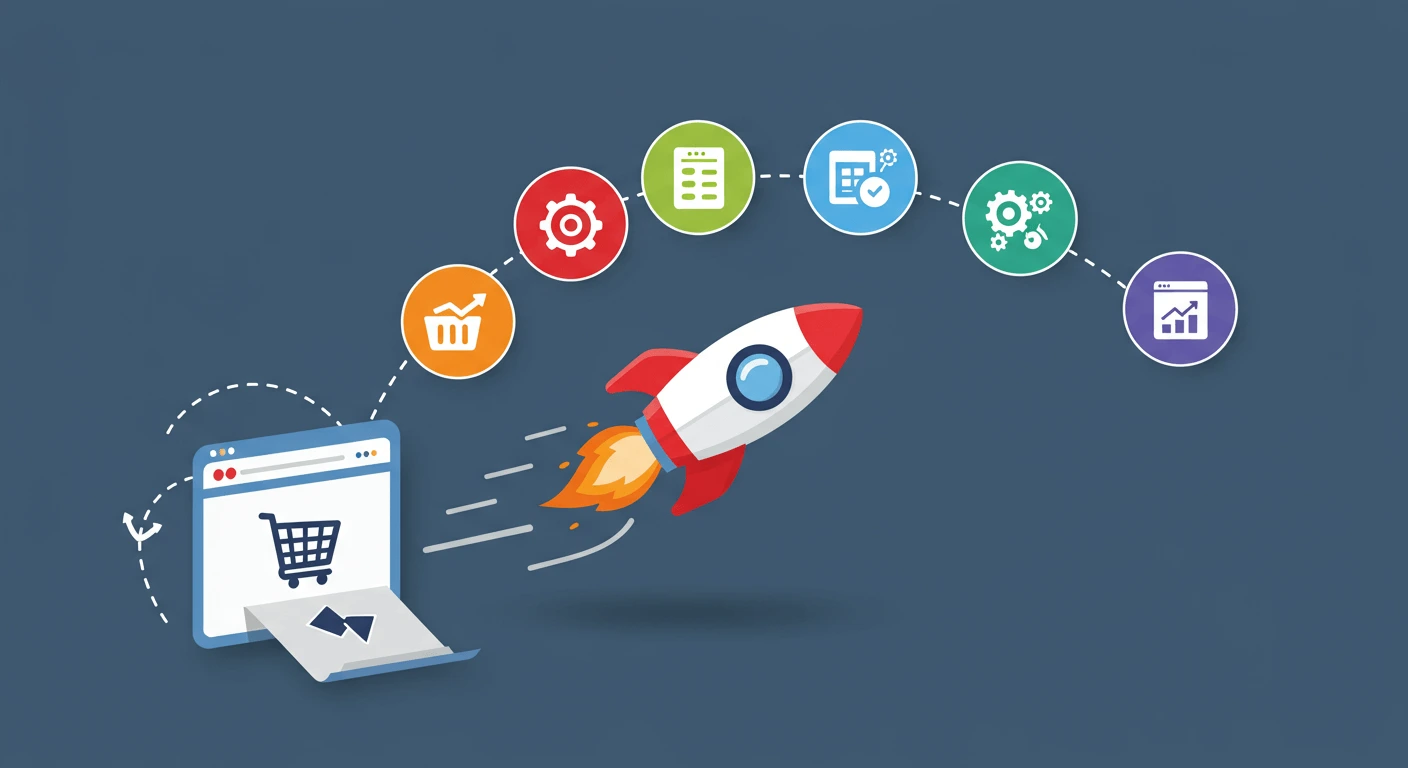
But here’s the good news: fixing it is often easier than you think. You don’t need to be a coding wizard. You just need a clear plan. In this guide, I’m going to personally walk you through my proven, five-step method to speed up your WooCommerce checkout. We’ll cover everything from the hidden issues in your website’s foundation to the simple tweaks on the page that make all the difference. Get ready to turn your frustratingly slow checkout into a smooth, lightning-fast experience that your customers will love.
Step 1: Build on a Strong Foundation (Your Hosting Matters More Than You Think)
Let’s talk about something that most people overlook until it’s too late: your website’s home, also known as its hosting. Imagine trying to build a strong, sturdy house on a foundation made of soft mud. No matter how beautiful the house is, it’s going to have problems. Your WooCommerce store is that house, and your hosting plan is the foundation. When it comes to checkout speed, a weak foundation is almost always the main culprit. I’ve seen countless store owners spend thousands on beautiful designs and clever marketing, only to be held back by a cheap, $5-a-month shared hosting plan.
A slow checkout isn’t just about the page itself; it’s about how quickly your website’s server can think. When a customer clicks “Place Order,” your site has a lot of work to do in just a few seconds. It needs to:
- Check inventory.
- Calculate taxes and shipping.
- Talk to the payment processor (like Stripe or PayPal).
- Create a user account (sometimes).
- Send confirmation emails.
- Update the order database.
On a cheap shared hosting plan, you’re sharing the server’s brainpower with hundreds, sometimes thousands, of other websites. If one of those sites gets a huge traffic spike, your site slows down. It’s like trying to have an important conversation in an incredibly loud and crowded room. When your checkout process needs that server’s full attention, it simply can’t get it. This is why you see that dreaded spinning wheel after clicking the final purchase button.
My Personal Experience: The Switch That Saved a Business
I once worked with a client selling handmade jewelry. They were getting decent traffic, but their sales were mysteriously low. People would add items to their cart but never finish the purchase. We ran some tests and found that their checkout page was taking over 12 seconds to process an order. Twelve seconds! In internet time, that’s an eternity.
They were on a popular, budget-friendly shared hosting plan. My first and only recommendation was to upgrade. We moved them to a managed WooCommerce hosting plan. These plans are specifically built and fine-tuned for how WooCommerce works. The very next day, with no other changes made to the website, their order processing time dropped to under 2 seconds. The result? Their sales increased by over 30% in the first month alone. It was the same store, same products, but built on a solid foundation. This is the single most impactful change you can make to speed up your WooCommerce checkout.
What to Look for in a Fast WooCommerce Host
When you’re looking for hosting, it’s easy to get lost in technical terms. Let me break down the most important things for you in simple language.
- Managed WooCommerce/WordPress Hosting: Don’t just get generic “web hosting.” Look for plans that say they are “Managed for WooCommerce.” This means the company has set up its servers specifically to make WooCommerce run fast. They handle the technical stuff for you. Some great options are Kinsta, WP Engine, and Cloudways.
- NVMe SSD Storage: This is a fancy term for a super-fast hard drive. Think of your website’s data sitting on a bookshelf. Old hard drives (HDDs) are like a messy, disorganized bookshelf where you have to search for every book. Newer drives (SSDs) are like a neatly organized shelf. The newest and fastest drives (NVMe SSDs) are like a magic bookshelf where the book you want instantly appears in your hand. This speed makes a huge difference in how quickly your site can find and process order information.
- Server-Level Caching: Imagine someone asks you your name. The first time, you have to think about it. But if they ask you 100 more times, you don’t have to think; the answer is ready to go. Caching is like that for your website. Server-level caching is the fastest type because the server itself remembers the answers, so it doesn’t have to do the hard work of building your web page from scratch every single time someone visits. We’ll talk more about caching later, but a host that provides this out of the box is a huge plus.
- Latest PHP Version: PHP is the coding language that WordPress and WooCommerce are built on. Each new version is like a new, smarter, and faster version of the language. Running on an old version of PHP is like trying to run a brand new video game on a 10-year-old computer. It will be slow and clunky. A good host will make it easy for you to use the latest, most stable version of PHP (you can usually change this with one click in your hosting dashboard).
Investing a little more in quality hosting isn’t an expense; it’s an investment in your sales. It’s the bedrock of a fast checkout and a successful store. Before you touch a single plugin or line of code, look at your foundation.
Step 2: Declutter Your Checkout Page (Less is More)
Once your store is sitting on a rock-solid hosting foundation, it’s time to look at the checkout page itself. Picture this: you’re excited to buy something, you click “Checkout,” and you’re hit with a giant form that looks like you’re applying for a passport. It asks for your home phone, your work phone, a company name, a second address line, and a dozen other things. What do you do? If you’re like most people, you sigh and think, “I’ll do this later.” And “later” often means “never.”
Every single field you ask a customer to fill out is a tiny bit of friction. It’s a tiny reason for them to stop. When you add up all those tiny bits of friction, you get a massive roadblock to sales. I have seen checkout pages with over 20 fields. It’s overwhelming! The goal of your checkout page is to take a customer’s money as quickly and easily as possible. To do that, you need to get out of their way.
One of the most powerful things I’ve ever done for clients is a “checkout field audit.” We sit down and look at every single field on the page and ask one simple question: “Do we absolutely need this information to complete the order?” You’d be amazed at what you can get rid of.
- Company Name: Unless you only sell to businesses (B2B), this field is almost always unnecessary.
- Address Line 2: Most people don’t have a second address line. It just confuses people. They wonder, “What am I supposed to put here?” and it slows them down. It’s better to make it optional or remove it entirely if your shipping provider doesn’t require it.
- Phone Number: Do you really need to call your customers? For most stores, an email is enough. If you do need it for your delivery service, make sure you explain why you need it (e.g., “For delivery updates”). But if you don’t need it, remove it.
- Order Notes: This big, empty box can cause analysis paralysis. Many customers feel they should write something in it. Making it optional is fine, but for many stores, especially those selling simple products, it can be removed.
How to Easily Remove Checkout Fields
You don’t need to be a programmer to do this. There’s a fantastic free plugin called Checkout Field Editor (Checkout Manager) for WooCommerce. Once installed, it gives you a simple visual editor of all your checkout fields. You can click a button to disable fields you don’t want, or you can drag and drop them to change their order.
I once worked with an online t-shirt store. We removed the “Company Name” and “Phone Number” fields and made “Address Line 2” optional. It was a 5-minute change. Just by doing that, they saw a 5% increase in completed checkouts. Why? Because the page looked cleaner, less intimidating, and faster to complete.
The Magic of Guest Checkout
Now for the biggest conversion killer of them all: forcing customers to create an account. Nobody wants another password to remember. Forcing a user to “Create an Account” before they can give you their money is like putting a locked door in front of your cash register.
You MUST enable guest checkout.
In your WooCommerce settings (WooCommerce > Settings > Accounts & Privacy), there’s a simple checkbox that says “Allow customers to place orders without an account.” Check it. This is non-negotiable for a modern online store.
But what about repeat customers? That’s easy. On that same settings page, there’s another option: “Allow customers to create an account during checkout.” This adds a simple, optional checkbox on the checkout page that says “Create an account?” This is the best of both worlds. New customers can fly through the checkout process as guests, and those who want an account can create one without any extra steps. It’s a seamless experience that respects the customer’s time.
By combining a decluttered form with an easy guest checkout option, you remove the psychological burden of the checkout process. You make it feel effortless, which is exactly how you want your customers to feel when they’re about to give you money. This is a critical step to optimize your WooCommerce checkout process.
Step 3: Tame Your Plugins and Theme (The Hidden Speed Killers)
Your WooCommerce store is like a LEGO creation. WordPress is the baseplate, WooCommerce is the main structure, and every plugin and your theme are extra bricks you add on. Some bricks are small and light. Others are huge and heavy. If you add too many heavy bricks, your whole creation can become slow, wobbly, and unstable. This is especially true during checkout.
Many store owners fall into the trap of “plugin-itis.” They have a plugin for everything: a plugin for popups, a plugin for social sharing, a plugin for custom fonts, a plugin for sliders, and on and on. While many of these plugins are useful on your homepage or blog posts, they can be absolute poison for your checkout page.
Here’s why: every active plugin on your site loads a little bit of code (usually some CSS and JavaScript files) on every single page. Even if the plugin’s feature isn’t visible on the checkout page, its code might still be loading in the background, slowing things down. Imagine trying to run a race while wearing a heavy winter coat, a backpack, and hiking boots. That’s what your checkout page is doing when it’s forced to load code from 30 different plugins.
Your theme is another big piece of this puzzle. Many themes look beautiful in their demos because they are packed with features: built-in sliders, fancy animations, page builders, and more. But all those features come at a cost—speed. A “heavy” theme can load dozens of unnecessary files on your checkout page, making it feel sluggish before the customer even types a single letter.
My “Plugin and Theme Audit” Process
I have a simple process I follow with every client to find and fix these speed killers. It takes a little time, but the payoff is huge.
1. Count Your Plugins: First, just go to the “Plugins” page in your WordPress dashboard. How many are active? If the number is over 20-25, you should probably do some spring cleaning. I’ve seen sites with over 80 active plugins, and they are almost always painfully slow.
2. Hunt for Slow Plugins: How do you know which plugins are the heavy ones? There’s an amazing free tool called Query Monitor. It’s a developer tool, but there’s one feature that’s super easy for anyone to use. After you install and activate it, visit your checkout page. You’ll see a new menu in your WordPress admin bar at the top. Hover over it, click on “Queries by Component,” and you can see a list of your plugins and how long each one is taking to “think” (run database queries). If you see a plugin that is consistently taking a long time to load, you’ve found a potential problem.
3. The Deactivation Test: The simplest way to test is to disable plugins one by one. Use a website speed testing tool like Google PageSpeed Insights or GTmetrix to test your checkout page speed. Then, deactivate one plugin and test it again. Did the speed improve significantly? If so, you’ve found a culprit. You need to decide if you really need that plugin or if there’s a lighter alternative.
4. Choose a Lightweight Theme: If you’re starting a new store or considering a redesign, your choice of theme is critical. Avoid themes that are bloated with features you’ll never use. Instead, opt for a theme that is famous for being lightweight and fast. My top recommendations are always: Astra, Kadence, GeneratePress.
5. Script Management: For more advanced users, you can use a plugin like Asset CleanUp or Perfmatters. These tools let you see all the code files (CSS and JavaScript) that are loading on your checkout page and allow you to disable the ones you don’t need. For example, you can tell the plugin for your contact form not to load its code on the checkout page, because there’s no contact form there. This is like selectively taking off the heavy winter coat and backpack before you run your race. It requires some care, but it can make a massive difference in your checkout loading time.
Your goal is to make your checkout page as lean and mean as possible. It should only load the absolute bare minimum of code required to function. By decluttering your plugins and choosing a fast theme, you remove the hidden weight that’s dragging your sales down.
Step 4: Master Caching and Delivery (Making Everything Instant)
Now that we have a strong foundation, a clean page, and lightweight code, let’s talk about making it all feel instantaneous. This is where two powerful concepts come into play: Caching and Content Delivery Networks (CDNs). These sound technical, but the ideas behind them are actually very simple.
Caching Explained Simply: The Short-Term Memory
Let’s go back to our brain analogy. When someone asks you a complicated math problem like “What is 345 times 78?” you have to stop and do the calculation. It takes time and effort. But if they ask you the same question again five seconds later, you don’t need to do the math again. You remember the answer. You’ve “cached” it.
Website caching works the exact same way. Without caching, every time a visitor lands on a page, your server has to do a lot of work. It has to grab the header, the footer, the content, run PHP code, get information from the database, and assemble it all into a webpage. This takes time. A caching plugin, like the popular and free WP Rocket or W3 Total Cache, does the hard work once and then saves a finished, static HTML copy of the page. The next time a visitor comes, the server just hands them the ready-made copy. It’s much, much faster.
BUT and this is the most important part you MUST exclude your checkout pages from caching.
Why? Because the Cart, My Account, and Checkout pages are unique for every single customer. They contain personal information like your name, your address, and what’s in your cart. You would never want to show a saved “cached” copy of my checkout page to another customer. That would be a huge security and privacy disaster!
Luckily, any good caching plugin knows this. When you set up a plugin like WP Rocket, it is smart enough to automatically exclude these critical WooCommerce pages from its cache. You should always double-check these settings. In the plugin’s “Advanced Rules” or “Exclude Pages” section, make sure you see /cart/, /checkout/, and /my-account/ listed. This ensures that the rest of your site is blazing fast, while your dynamic checkout pages can still function correctly and securely.
CDNs Explained Simply: Copies of Your Store Around the World
Imagine your online store’s server is in New York. If a customer from New York visits your site, the data doesn’t have to travel very far, so it’s fast. But what if a customer from Los Angeles, or even London, visits your site? The data has to travel all the way across the country or the ocean. This physical distance creates a delay, known as latency.
A Content Delivery Network, or CDN, solves this problem in a brilliant way. It takes copies of the static parts of your website—like your images, your logo, and your code files (CSS/JS)—and stores them on servers all over the world. So, when that customer from London visits your site, their browser doesn’t have to fetch the images from New York. It can grab them from a much closer server in London. This dramatically speeds up how fast the page visually loads for your customers, no matter where they are.
While the main checkout process still has to happen on your main server in New York, all the supporting files load from the CDN. This makes the page feel much faster and reduces the load on your main server, freeing it up to process the payment more quickly.
Many modern hosting companies, like Kinsta or Cloudways, include a CDN as part of their plan. There are also services like Cloudflare, which offers a fantastic free CDN that is very easy to set up for any WordPress site. Using a CDN is a standard practice for any serious online store and has a direct impact on the perceived performance of your checkout page.
Finally, don’t forget image optimization. Even on a checkout page, you might have small trust badges or product thumbnails. Make sure these images are compressed. A plugin like ShortPixel or Imagify can automatically shrink the file size of your images without reducing their quality. Smaller image files mean a faster loading page. Every kilobyte counts!
By correctly configuring caching and using a CDN, you’re not just speeding up your site; you’re creating a robust, global, and instantly responsive experience for every user.
Step 5: Optimize Your Payment Gateways (The Final Hurdle)
Your customer has navigated your site, filled their cart, entered their shipping details on your now-super-fast checkout page, and they are ready to click that final, glorious “Place Order” button. This is the moment of truth. What happens next is entirely dependent on your payment gateway.
A payment gateway is the service that securely connects your website to the bank, processes the credit card transaction, and sends a “success” or “failure” message back to your store. This communication can be a major bottleneck. I’ve seen stores where the page itself loads in one second, but clicking “Place Order” results in a 10-second wait while the gateway thinks. This is terrifying for a customer. They might wonder if the site is broken, if their card was charged multiple times, or they might just get impatient and click away, abandoning the order at the last possible second.
The speed of this final step depends on two things: the gateway you choose and how it’s integrated into your site.
Direct vs. Redirect Gateways
There are two main types of payment gateways, and they have different impacts on the user experience and speed.
- Direct Gateways: These gateways, like Stripe or Braintree, allow the customer to enter their credit card information directly on your checkout page. The transaction happens in the background without the customer ever leaving your site. This is generally a better, faster, and more seamless experience. The customer stays in one place, feels more secure, and the process feels integrated. Top-tier gateways like Stripe have heavily optimized their code (their “scripts”) to be incredibly lightweight and fast, so they don’t slow down your page load time.
- Redirect Gateways: These gateways, like a standard PayPal account, take the customer off your website to the PayPal site to complete the payment. After they pay, they are then redirected back to your “Thank You” page. This process adds extra steps and loading time. The customer has to wait for the PayPal site to load, log in, confirm the payment, and then wait to be sent back. Each step is a potential point of failure or abandonment.
While redirecting can sometimes feel simpler to set up, I almost always recommend using a direct gateway for the best checkout experience. WooCommerce Payments (which is powered by Stripe) is an excellent, free, and deeply integrated option that keeps users on your site and is built for speed.
Troubleshooting Slow Gateways
What if you’re already using a good gateway like Stripe, but it’s still slow? Here are a few things I check for:
- API Connection Issues: Your site talks to the gateway through something called an API. Sometimes, due to server configuration or security plugin conflicts, this “conversation” can be slow. A quick way to test this is to temporarily switch your store into “test mode” or “sandbox mode” within the gateway’s settings. If test transactions are fast, but real ones are slow, it might point to a problem with the live connection.
- Outdated Plugins: Make sure your WooCommerce plugin, your payment gateway’s specific plugin (e.g., the “Stripe for WooCommerce” plugin), and WordPress itself are all up to date. Updates often include performance improvements and bug fixes that can resolve speed issues.
- Conflicts with Other Plugins: Just like we discussed in Step 3, another plugin could be interfering with your payment gateway’s scripts. A security plugin might be blocking the gateway’s requests, or a poorly coded plugin might be causing JavaScript errors on the page. Using your browser’s “Inspect” tool and looking at the “Console” tab can show you if there are any red error messages happening when you try to check out.
Choosing a fast, reliable, and direct payment gateway is the final piece of the puzzle. It ensures that the very last step of your customer’s journey is as smooth and quick as all the steps that came before it. By focusing on providers like Stripe and ensuring a clean integration, you complete the process of building a truly fast WooCommerce checkout setup.
Conclusion: Your Fast Checkout Awaits
We’ve covered a lot of ground, but it all boils down to a simple idea: respect your customer’s time. A slow checkout is disrespectful. It creates frustration and doubt at the most critical moment of the sale. But by taking a methodical approach, you can transform that experience from a point of friction into a competitive advantage.
Let’s quickly recap my proven 5-step method:
- Build on a Strong Foundation: Move to quality, managed WooCommerce hosting. It’s the single biggest speed upgrade you can make.
- Declutter Your Checkout Page: Remove every unnecessary field and make guest checkout the default, easy option.
- Tame Your Plugins and Theme: Choose a lightweight theme and conduct a plugin audit to remove the hidden code that’s slowing you down.
- Master Caching and Delivery: Use a caching plugin (with checkout pages excluded!) and a CDN to make your site feel instant to users anywhere in the world.
- Optimize Your Payment Gateways: Choose a fast, direct gateway like Stripe to ensure the final “Place Order” click is seamless.
Don’t feel like you have to do all of this at once. Start with one tip today. My recommendation? Conduct the checkout field audit we discussed in Step 2. It takes less than 15 minutes and can have an immediate impact. See the difference it makes, and then move on to the next step. Your sales—and your customers—will thank you for it.
Frequently Asked Questions (FAQ)
1. Why is my WooCommerce checkout so slow?
Your WooCommerce checkout is likely slow due to a combination of factors: slow web hosting, too many form fields, bloated themes and plugins loading unnecessary code, or a slow payment gateway processing the final transaction.
2. How can I speed up WooCommerce checkout without a plugin?
Without plugins, you can speed up checkout by manually removing unnecessary fields using code (functions.php), choosing a lightweight theme, enabling guest checkout in WooCommerce settings, and upgrading to a faster hosting plan with server-level caching.
3. Does the payment gateway affect checkout speed?
Yes, absolutely. A direct payment gateway like Stripe is generally much faster than a gateway that redirects the customer to another website to pay, as it involves fewer steps and loading screens.
4. What is the fastest WooCommerce checkout theme?
Themes built for speed and minimalism, like Astra, Kadence, and GeneratePress, are excellent choices for a fast WooCommerce checkout because they don’t load unnecessary features or heavy code on the page.
5. Can too many plugins slow down the checkout process?
Yes. Every plugin can add code (CSS/JavaScript) that loads on the checkout page, even if it’s not used there. Having too many, or even just one poorly coded plugin, can significantly increase loading times.
6. How do I enable guest checkout in WooCommerce?
Go to your WordPress dashboard, navigate to WooCommerce > Settings > Accounts & Privacy, and check the box labeled “Allow customers to place orders without an account.”
7. Should I use a one-page checkout?
A one-page checkout can be faster for some stores with very few fields. However, a well-optimized, multi-step checkout can often feel less overwhelming to customers. The key is to reduce fields and loading time, whether it’s on one page or broken into simple steps.